> ## Documentation Index
> Fetch the complete documentation index at: https://vastai-80aa3a82-ltxv2-serverless.mintlify.site/llms.txt
> Use this file to discover all available pages before exploring further.
# QuickStart
This Quickstart will guide you through setting up your Vast.ai account and running your first instance in just a few steps.
### 1. Sign Up & Add Credit
* Create an account on [vast.ai.](https://cloud.vast.ai/)
* Verify your email address.
* Go to [**Billing**](/documentation/reference/billing) → **Add Credit** and top up using [credit card, Coinbase, or Crypto.com](/documentation/reference/billing#payment-methods).
* Learn about [auto-billing](/documentation/reference/billing#auto-debit) to avoid interruptions.
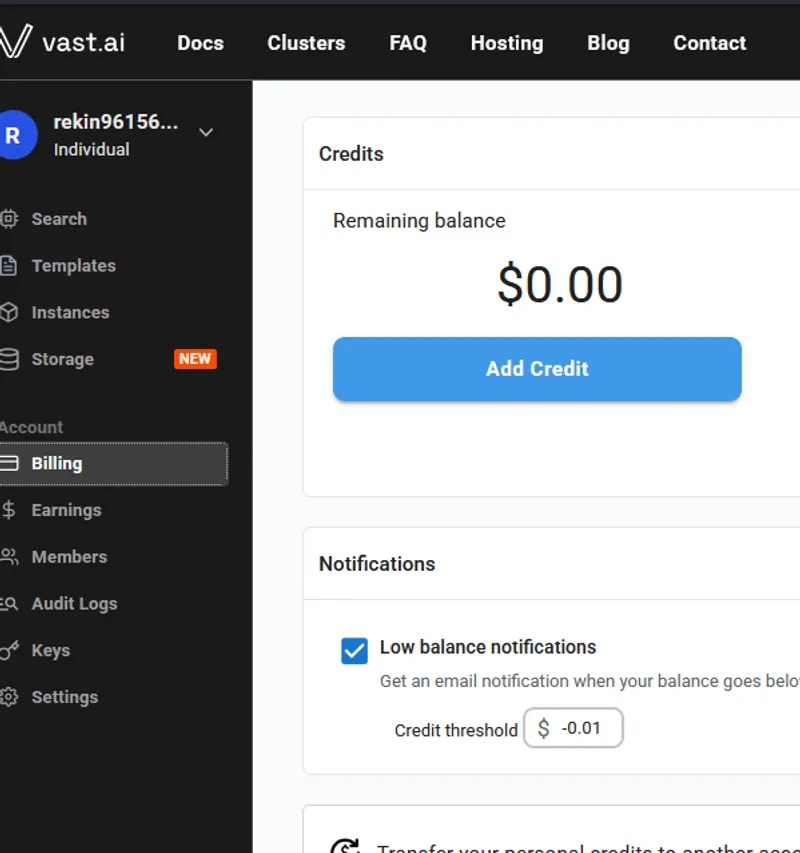 * Your balance appears at the top right of the dashboard.
 Before you can **rent a machine** or **create a team**, you must [verify your email address](/documentation/reference/account-settings#email-verification). After signing up, check your inbox (and spam folder) for the verification email and click the link inside. You can resend the verification email anytime from [**Settings**](/documentation/reference/account-settings) → Resend Verification Email. Learn more about [teams](/documentation/teams/teams-overview) and [instance management](/documentation/instances/manage-instances).
### 2**. Prepare to Connect**
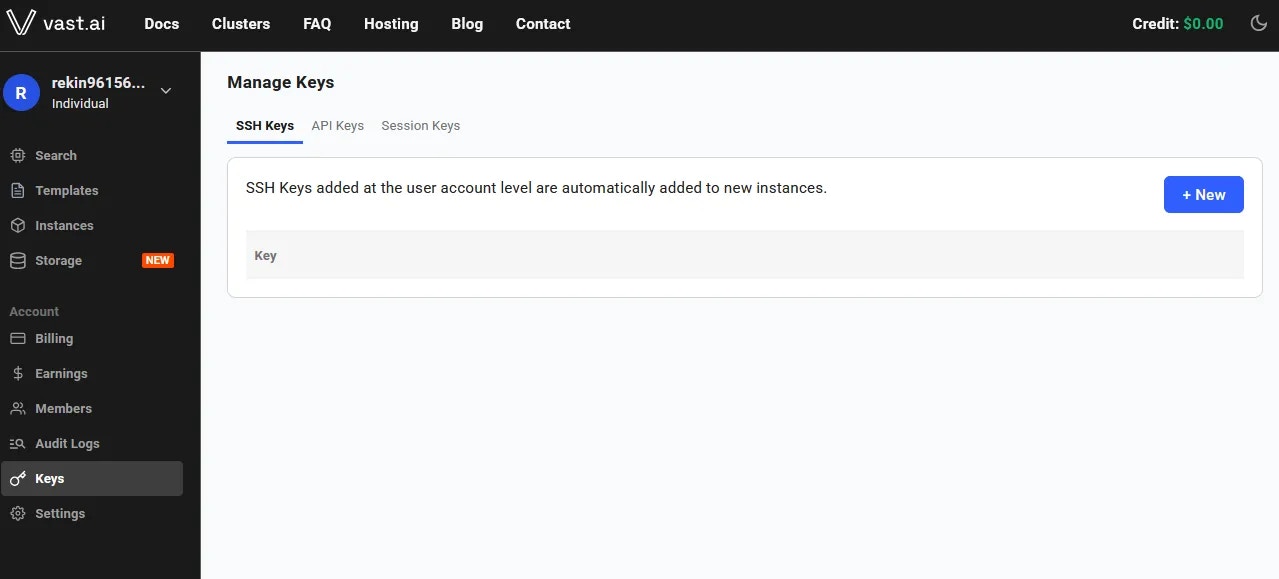
* **For SSH access**: generate an [SSH key pair](/documentation/instances/connect/ssh#generating-ssh-keys) following our [complete SSH guide](/documentation/instances/connect/ssh) and upload your **public key** in [Keys page](https://cloud.vast.ai/manage-keys/) or via [account settings](/documentation/reference/keys).
Before you can **rent a machine** or **create a team**, you must [verify your email address](/documentation/reference/account-settings#email-verification). After signing up, check your inbox (and spam folder) for the verification email and click the link inside. You can resend the verification email anytime from [**Settings**](/documentation/reference/account-settings) → Resend Verification Email. Learn more about [teams](/documentation/teams/teams-overview) and [instance management](/documentation/instances/manage-instances).
### 2**. Prepare to Connect**
* **For SSH access**: generate an [SSH key pair](/documentation/instances/connect/ssh#generating-ssh-keys) following our [complete SSH guide](/documentation/instances/connect/ssh) and upload your **public key** in [Keys page](https://cloud.vast.ai/manage-keys/) or via [account settings](/documentation/reference/keys).
 * **For Jupyter access**: download and install the provided [TSL certificate](/documentation/instances/connect/jupyter#certificate-installation) following our [Jupyter setup guide](/documentation/instances/connect/jupyter) (needed for secure browser access).
If you don’t install the provided browser certificate:
* **Windows / Linux** – You’ll see a **“Your connection is not private”** privacy warning. You can still connect by clicking **Advanced** → **Proceed**, but the warning will appear every time.
* **macOS** – Browsers will block Jupyter until you install and trust the provided certificate in **Keychain Access**. Without it, you won’t be able to connect.
Installing the certificate once removes the warning permanently.
### 3. Pick a [**Template**](/documentation/templates/introduction) & Find a Machine
* Browse [**Templates**](https://cloud.vast.ai/templates/) for pre-built setups (e.g., [PyTorch](/pytorch), TensorFlow, ComfyUI) or [create custom templates](/documentation/templates/creating-templates).
* Go to [**Search**](https://cloud.vast.ai/create/) and filter by GPU type, count, RAM, CPU, network speed, and price. Learn about [search filters](/documentation/instances/choosing/overview#search-filters) and [instance types](/documentation/instances/choosing/instance-types).
* **Disk Space is Permanent.** The disk size you choose when creating an instance cannot be changed later. If you run out of space, you'll need to create a new instance with a larger disk. Learn about [storage types](/documentation/instances/storage/types) and [volumes](/documentation/instances/storage/volumes). Tip: Allocate a bit more than you think you need to avoid interruptions.
* Click **Rent** when you find a match. Consider [reserved instances](/documentation/instances/choosing/reserved-instances) for 50% savings on long-term projects.
* Wait for the instance to start—cached images launch quickly, fresh pulls may take 10–60 minutes. Check [instance status](/documentation/instances/manage-instances#status) for progress.
* Click **Open** button to access your instance via your chosen [connection method](/documentation/instances/connect/overview).
### **4. [Manage or End Your Instance](/documentation/instances/manage-instances)**
* Use **Stop** to pause GPU billing ([storage still accrues charges](/documentation/instances/storage/types#costs)). Learn about the [instance lifecycle](/documentation/instances/manage-instances#lifecycle).
* Use **Delete** when finished to stop *all* charges. See [data movement](/documentation/instances/storage/data-movement) if you need to save data first.
* **For Jupyter access**: download and install the provided [TSL certificate](/documentation/instances/connect/jupyter#certificate-installation) following our [Jupyter setup guide](/documentation/instances/connect/jupyter) (needed for secure browser access).
If you don’t install the provided browser certificate:
* **Windows / Linux** – You’ll see a **“Your connection is not private”** privacy warning. You can still connect by clicking **Advanced** → **Proceed**, but the warning will appear every time.
* **macOS** – Browsers will block Jupyter until you install and trust the provided certificate in **Keychain Access**. Without it, you won’t be able to connect.
Installing the certificate once removes the warning permanently.
### 3. Pick a [**Template**](/documentation/templates/introduction) & Find a Machine
* Browse [**Templates**](https://cloud.vast.ai/templates/) for pre-built setups (e.g., [PyTorch](/pytorch), TensorFlow, ComfyUI) or [create custom templates](/documentation/templates/creating-templates).
* Go to [**Search**](https://cloud.vast.ai/create/) and filter by GPU type, count, RAM, CPU, network speed, and price. Learn about [search filters](/documentation/instances/choosing/overview#search-filters) and [instance types](/documentation/instances/choosing/instance-types).
* **Disk Space is Permanent.** The disk size you choose when creating an instance cannot be changed later. If you run out of space, you'll need to create a new instance with a larger disk. Learn about [storage types](/documentation/instances/storage/types) and [volumes](/documentation/instances/storage/volumes). Tip: Allocate a bit more than you think you need to avoid interruptions.
* Click **Rent** when you find a match. Consider [reserved instances](/documentation/instances/choosing/reserved-instances) for 50% savings on long-term projects.
* Wait for the instance to start—cached images launch quickly, fresh pulls may take 10–60 minutes. Check [instance status](/documentation/instances/manage-instances#status) for progress.
* Click **Open** button to access your instance via your chosen [connection method](/documentation/instances/connect/overview).
### **4. [Manage or End Your Instance](/documentation/instances/manage-instances)**
* Use **Stop** to pause GPU billing ([storage still accrues charges](/documentation/instances/storage/types#costs)). Learn about the [instance lifecycle](/documentation/instances/manage-instances#lifecycle).
* Use **Delete** when finished to stop *all* charges. See [data movement](/documentation/instances/storage/data-movement) if you need to save data first.
 ## Common Questions
### What is a minimum deposit amount?
The minimum deposit amount on Vast.ai is \$5.
### What happens when my balance runs out? Can I avoid interruptions?
When your balance reaches zero, your running instances will automatically stop. To avoid this, you can enable [**auto-billing**](/documentation/reference/billing#auto-debit) on the [Billing page](/documentation/reference/billing). Set an auto-charge threshold higher than your average daily spend, so your card is automatically charged when your balance falls below that amount. We also recommend setting a [**low-balance email alert**](/documentation/reference/account-settings#notifications) at a slightly lower threshold to notify you if the auto-charge fails for any reason. Learn more about [billing management](/documentation/reference/billing) and [cost optimization](/documentation/instances/pricing).
### How can I customize a template?
You can create a new template from scratch, or you can edit an existing template. You can find a guide [here](/documentation/templates/creating-templates). See also [template settings](/documentation/templates/template-settings) and [advanced setup](/documentation/templates/advanced-setup) for more customization options. Learn about [managing templates](/documentation/templates/managing-templates) for organizing your template library.
## Next Steps
Complete guide to GPU instances, types, and management
Marketplace pricing, instance types, and saving strategies
Pre-built environments, customization, and Docker setup
## Common Questions
### What is a minimum deposit amount?
The minimum deposit amount on Vast.ai is \$5.
### What happens when my balance runs out? Can I avoid interruptions?
When your balance reaches zero, your running instances will automatically stop. To avoid this, you can enable [**auto-billing**](/documentation/reference/billing#auto-debit) on the [Billing page](/documentation/reference/billing). Set an auto-charge threshold higher than your average daily spend, so your card is automatically charged when your balance falls below that amount. We also recommend setting a [**low-balance email alert**](/documentation/reference/account-settings#notifications) at a slightly lower threshold to notify you if the auto-charge fails for any reason. Learn more about [billing management](/documentation/reference/billing) and [cost optimization](/documentation/instances/pricing).
### How can I customize a template?
You can create a new template from scratch, or you can edit an existing template. You can find a guide [here](/documentation/templates/creating-templates). See also [template settings](/documentation/templates/template-settings) and [advanced setup](/documentation/templates/advanced-setup) for more customization options. Learn about [managing templates](/documentation/templates/managing-templates) for organizing your template library.
## Next Steps
Complete guide to GPU instances, types, and management
Marketplace pricing, instance types, and saving strategies
Pre-built environments, customization, and Docker setup